Written on Saturday January 30, 2021
Loopy is cloud based video analysis and video tracking software used through your web browser. You
can use it online (free trial) or via
a dedicated private server for your research group.
In both cases you might want to use a scripting language such as R or Python, to automatically retrieve
your video tracking results for further analysis.
In this short example we demonstrate how to use the API in Python to download and plot a
deep learning tracking result.
If you can not see the embedded IPython notebook below, the
code is posted on github.
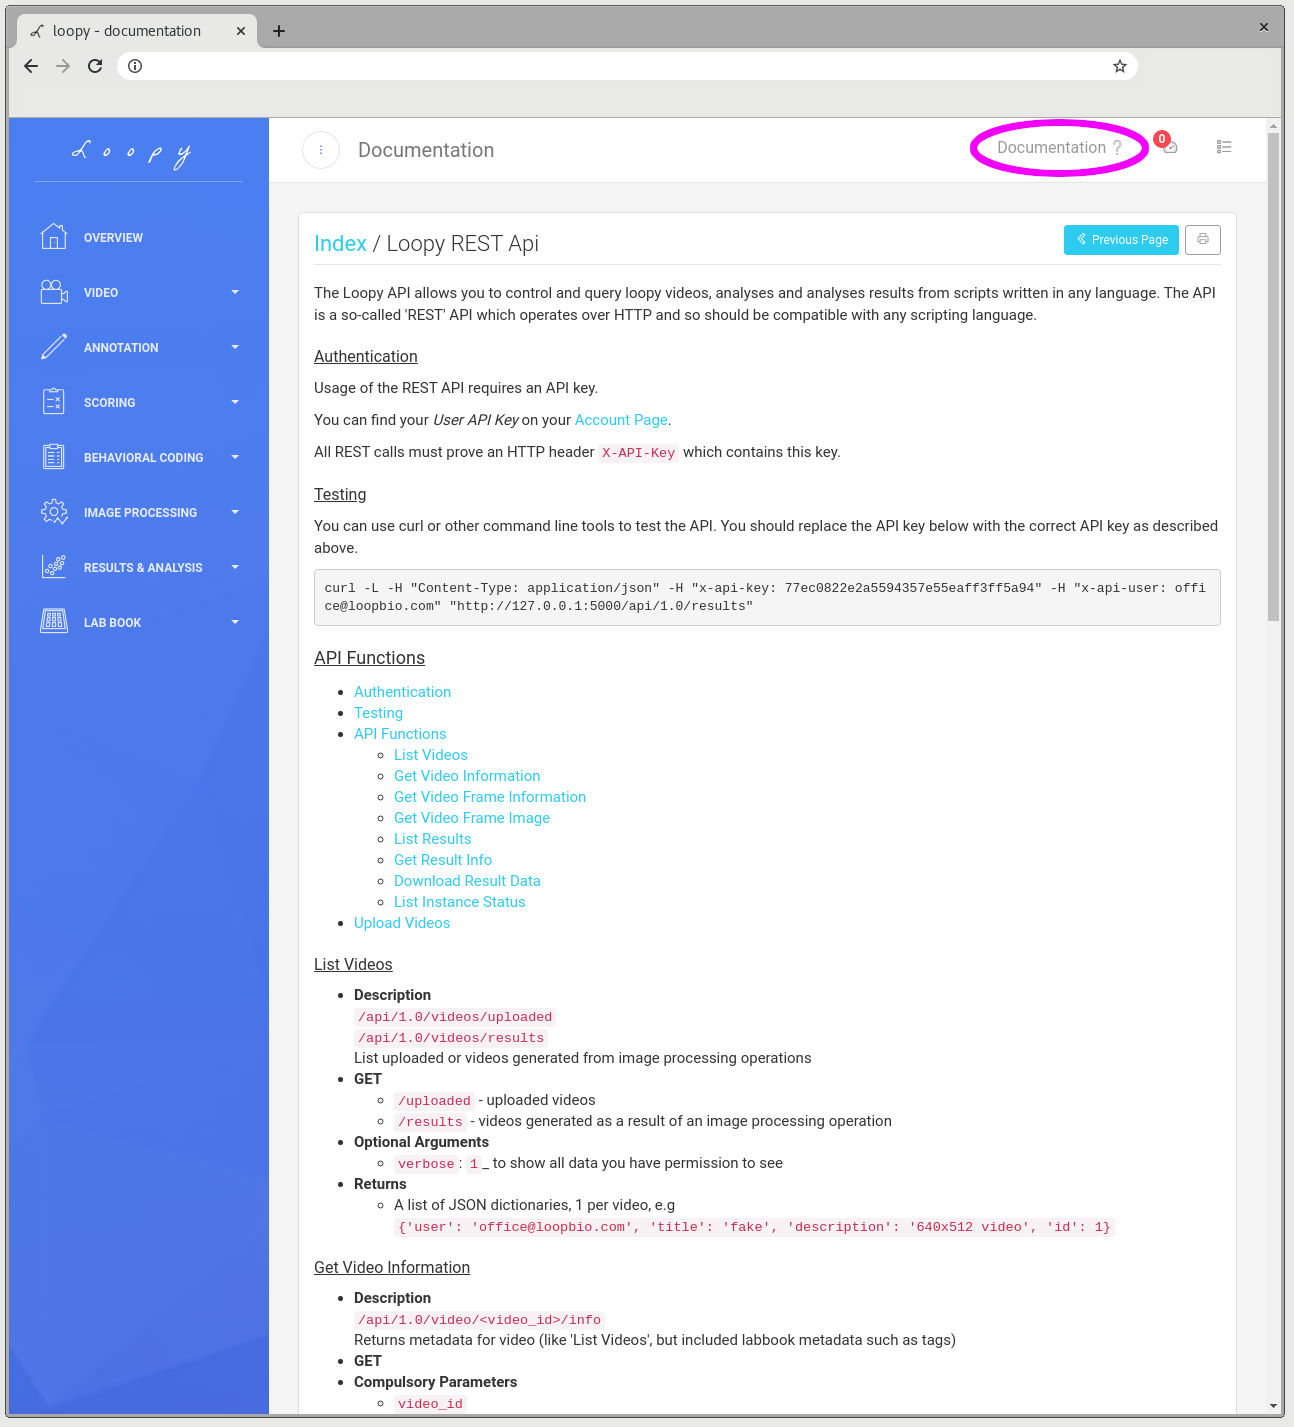
Documentation
All Loopy documentation, including the API documentation, can be easily accessed by
clicking on 'Documentation' once logged in.
Interested in Loopy?
Loopy is software for 2D and 3D animal tracking, image processing, deep learning,
behavior coding, and analysis. Loopy is used through your web browser - there is
no software to install. New features are constantly added to Loopy and are immediately
available to all - without extra cost.
If you have a large research group Loopy on-site can be used by all members at once, with data
sharing and secure video storage. This keeps all you raw data and tracking results in one place
for security and organisation.
If you are interested in trying Loopy system, please
sign up for a free loopy account. For a quote
for multiple users or for Loopy on-site please contact us to see how we can help support your
science.
Written on Monday February 25, 2019
Over the last couple of months we released a couple of interesting open source tools that might
be of use to some hackers out there. In typical bad-at-marketing-busy-company form we
then forgot to blog about them!
Stitchup is a python library for stitching multiple
videos together into a larger video mosaic or video panorama. This is a common scenario for users of
Motif video recording systems who have multiple-camera setups
to increase their spatial and temporal resolution.
Stitchup adds some functionality
(storing and loading of calibrations) and considerably improves upon the OpenCV in-tree
stitcher module Python API. Stitchup was used in the example above and for our previous
post on multi-camera high throughput c.elegans screening assay
Imgstore is a seekable and scalable for video frames and
metadata (see announcement and imgstore introduction here). Well,
we just released version 2.0
(and then 2.1, 2.2, and 2.3).
API compatibility was retained, however the 2.0 release features a few nice new features and
signifigant bugfixes
- Support for writing
h264 mp4 (.mkv) files was added
imgstore.align was added for aligning 'synchronizing' multiple simultaenously recorded
imgstores- Added utils for re-indexing stores around 0 and for other framenumber manipulation
- Many bug fixes
The new version can be installed from pypi using pip install -U imgstore.
Interested in Motif?
Motif is the first video and camera
recording system designed for the experiments of modern scientists. It supports single and
multiple synchronized camera scenarios, remote operation, high framerate and unlimited duration
recording. It is always updated and has no single-user or other usage limitations.
If you are interested in aMotif system, please contact us for a
quote or to see how Motif can solve your video recording needs.
Written on Wednesday October 17, 2018
We were approached by Andre Brown
to create a custom imaging setup for high-throughput worm screening. Dr. Brown and
his team are searching for novel neuroactive compounds using the nematode
C. elegans. He explained:
"To screen a large number of drugs, it helps to image many worms
in multiwell plates. Normal plate scanning microscopes don't help because
we want to see behaviour changes that require looking at each worm for
minutes so we have to image the worms in parallel. At the same time, we
need enough resolution to extract a detailed behavioural fingerprint using
Tierpsy Tracker.
A six-camera array provides the pixel density and frame rate we need
and opens the door to phenotypic screens for complex behaviours at an
unprecedented scale."
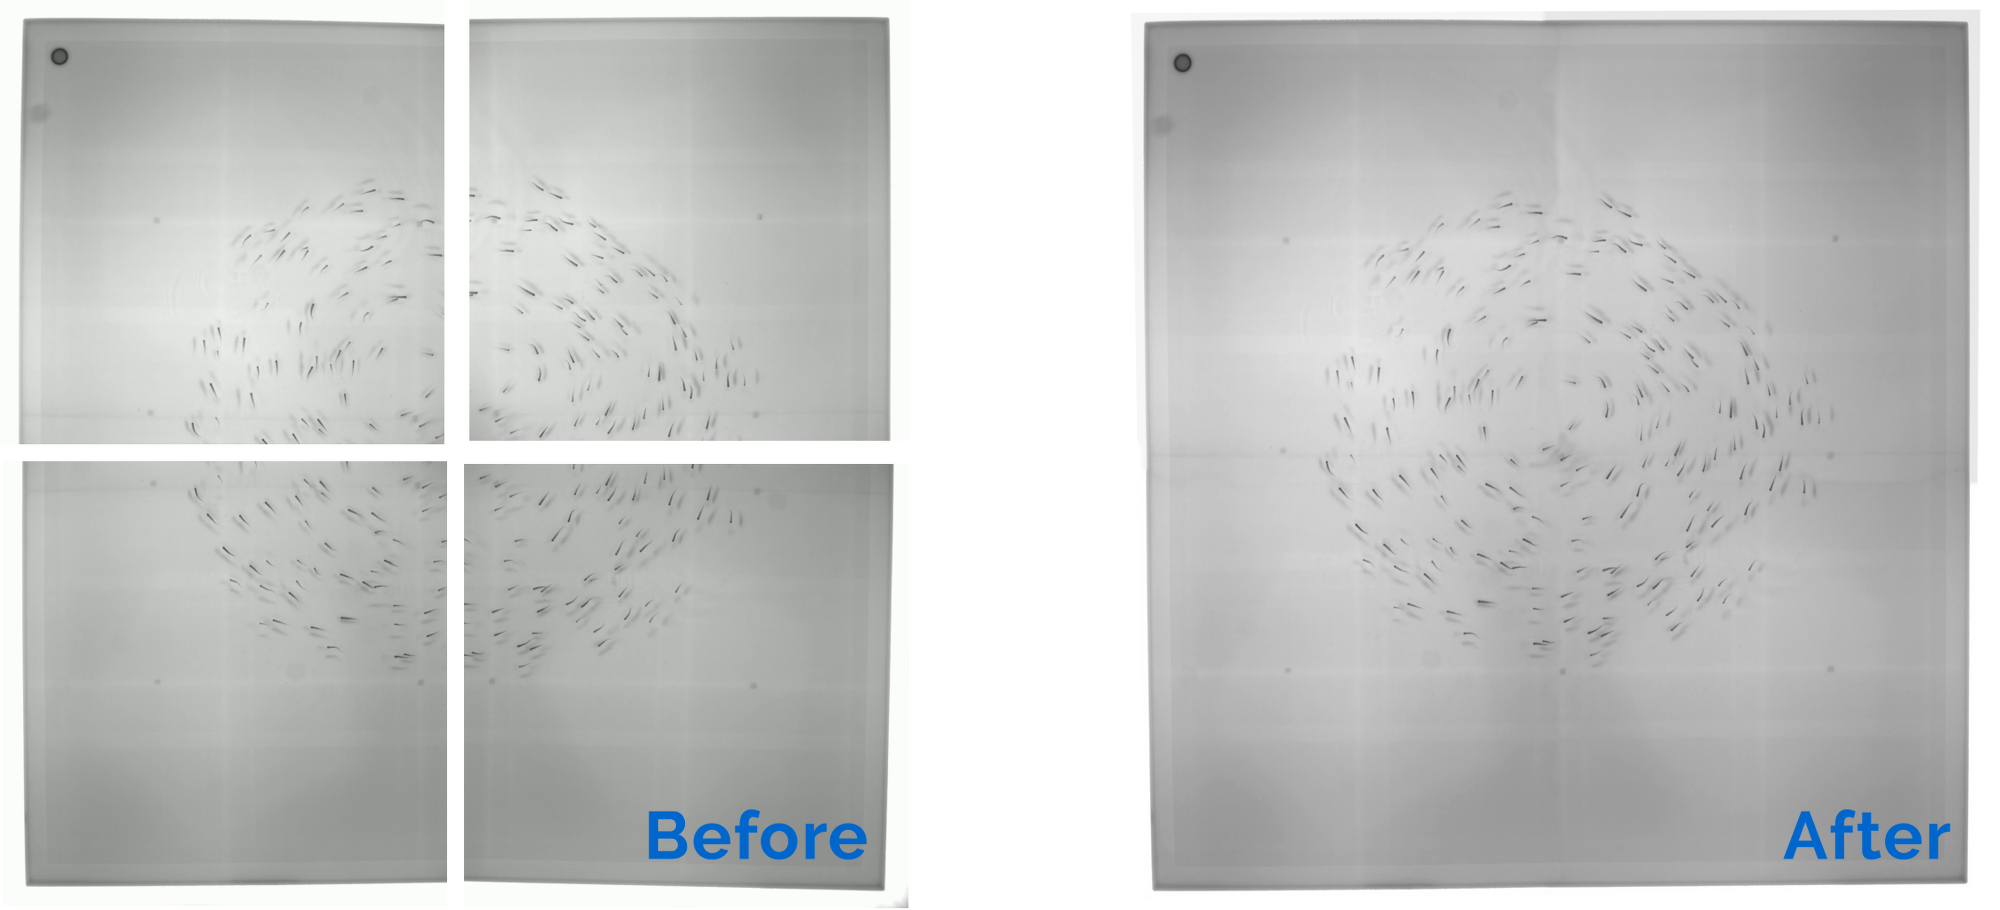
The Solution
To meet the requirements we designed a solution using 6x 12 Megapixel cameras
at 25 frames per second. To save on storage space, all video is compressed in
real-time, at exceptional quality, before being saved to disk. The flexibility
of Motif allows synchronized recording from all cameras, controlled from a
single web-based user interface.
For an impression of the images possible with such a system, check out
the interactive (mouse over / touch for zoom controls) viewer below.
unfortunately the generation of the visualisation above introducted some
artifacts not present in the orignal video
Interested in Motif?
Motif is the first video and camera recording system designed for the
experiments of modern scientists. It supports single and multiple synchronized
camera scenarios, remote operation, high framerate and unlimited duration
recording. It is always updated and has no single-user or other usage limitations.
If you are interested in a Motif system, please contact us for a
quote or to see how Motif can solve your video recording needs.
Written on Friday May 25, 2018
At loopbio we maintain some linux packages for use with the conda package manager. These can
replace the original packages present in the community-driven conda-forge channel, while retaining
full compatibility with the rest of the packages in the conda-forge stack. They include some
useful modifications that make them more suited to us, but that we find difficult to submit
"upstream" for inclusion in the respective official packages.
Why might our packages be useful to you?
- The default OpenCV packages provided in conda are GPL due to their dependence
on the conda provided FFMPEG which is build as GPL.
If you are using these packages in your code, then your code is GPL
(upon distribution, by the safest interpretation of the license).
If you want to be sure that your code is GPL free, then use our matching LGPL-ffmpeg and OpenCV
packages.
- You wish you control the number of threads OpenCV uses (via FFMPEG) for video decoding.
- You want much faster jpeg compression and decompression.
At the time of writing this note, we are actively maintaining three packages:
- ffmpeg: provides a LGPL alternative to avoid "viral" licenses in your codebase if
you depend on ffmpeg but do not need H.264 encoding.
- opencv: works against any of our ffmpeg variants (giving more licensing freedom)
and also using turbo for jpeg (de)compression, it also adds a few other goodies like replacing openmp
with TBB as the threading managing solution or including a patch to enable controlling
multi-threading when using opencv as a video decoding frontend to ffmpeg.
- libjpeg-turbo: allows to parallel install turbo with conda-forge official jpeg 9b library,
enabling much faster jpeg compression and decompression
while avoiding software crashes due to libjpeg libraries incompatibilities.
We have written a getting started with Conda guide here. If you
are already familiar with conda then replacing your conda-forge packages with ours is a breeze.
Using your command line:
# Before getting our conda packages, get a conda-forge based environment.
# For example, use conda-forge by default for all your environments.
conda config --add channels conda-forge

# install and pin ffmpeg GPL (including libx264)...
conda install 'loopbio::ffmpeg=*=*gpl*'

# ...or install and pin ffmpeg LGPL (without libx264)
conda install 'loopbio::ffmpeg=*=*lgpl*'

# install and pin libjpeg-turbo
# note, this is not needed for opencv to use libjpeg-turbo
conda install 'loopbio::libjpeg-turbo=1.5.90=noclob_prefixed_gcc48_*'

# install and pin opencv
conda install 'loopbio::opencv=3.4.3=*h6df427c*'
If you use these packages and find any problem, please let us know using each package issue tracker.
Example: controlling ffmpeg number of threads when used through OpenCV VideoCapture
We have added an environment variable OPENCV_FFMPEG_THREAD_COUNT that controls
ffmpeg's thread_count, and a capture read-only property cv2.CAP_PROP_THREAD_COUNT
that can be queried to get the number of threads used by a VideoCapture object.
The reason why an environment variable is needed and the property is read only is
that the number of threads is a property that needs to be set early in ffmpeg's
lifecycle and should not really be modified once the video reader is open. Note that
threading support actually depends on the codec used to encode the video (some codecs might,
for example, ignore setting thread_count). At the moment we do not support changing
the threading strategy type (usually one of slice or frame).
The following are a few functions that help controlling the number of threads used by ffmpeg
when decoding a video via opencv VideoCapture objects.
  1
  2
  3
  4
  5
  6
  7
  8
  9
 10
 11
 12
 13
 14
 15
 16
 17
 18
 19
 20
 21
 22
 23
 24
 25
 26
 27
 28
 29
 30
 31
 32
 33
 34
 35
 36
 37
 38
 39
 40
 41
 42
 43
 44
 45
 46
 47
 48
 49
 50
 51
 52
 53
 54
 55
 56
 57
 58
 59
 60
 61
 62
 63
 64
 65
 66
 67
 68
 69
 70
 71
 72
 73
 74
 75
 76
 77
 78
 79
 80
 81
 82
 83
 84
 85
 86
 87
 88
 89
 90
 91
 92
 93
 94
 95
 96
 97
 98
 99
100
101
102
103
104
105
106
107
108
109
110
111
112
113
114
115
116
117
118
119
120
121
122
123
124
125
126
127
128
129
130
131
132
133
134
135
136
137
138
139
140
141
142
143
144
145
146
147
148
149
150
151
152
153
154
155
156
157
158
159
160
161
162
163
164
165
166
167
168
169
170
171
172
173
174
175
176
177
178
179
180
181
182
183
184
185
186
187
188
189
190
191
192
193
194
195
196
197
198
199 | """OpenCV utils."""
import contextlib
import os
import cv2
import logging
_log = logging.getLogger(__package__)
@contextlib.contextmanager
def cv2_num_threads(num_threads):
"""Context manager to temporarily change the number of threads used by opencv."""
old_num_threads = cv2.getNumThreads()
cv2.setNumThreads(num_threads)
yield
cv2.setNumThreads(old_num_threads)
# A string to request not to change the current value of an envvar
USE_CURRENT_VALUE = object()
@contextlib.contextmanager
def envvar(name, value=USE_CURRENT_VALUE):
"""
Context manager to temporarily change the value of an environment variable for the current process.
Remember that some envvars only affects the process on startup (e.g. LD_LIBRARY_PATH).
Parameters
----------
name : string
The name of the environment value to modify.
value : None, `cv2utils.USE_CURRENT_VALUE` or object; default "USE_CURRENT_VALUE"
If `cv2utils.USE_CURRENT_VALUE`, the environment variable value is not modified whatsoever.
If None, the environment variable value is temporarily removed, if it exists.
Else, str(value) will be temporarily set as the value for the environment variable
Examples
--------
When a variable is not already set...
>>> name = 'AN_ENVIRONMENT_VARIABLE'
>>> with envvar(name, None):
... print(os.environ.get(name))
None
>>> with envvar(name, USE_CURRENT_VALUE):
... print(os.environ.get(name))
None
>>> with envvar(name, 42):
... print(os.environ.get(name))
42
>>> print(os.environ.get(name))
None
When a variable is already set...
>>> os.environ[name] = 'a_default_value'
>>> with envvar(name, USE_CURRENT_VALUE):
... print(os.environ.get(name))
a_default_value
>>> with envvar(name, None):
... print(os.environ.get(name))
None
>>> print(os.environ.get(name))
a_default_value
>>> with envvar(name, 42):
... print(os.environ.get(name))
42
>>> print(os.environ.get(name))
a_default_value
"""
if value is USE_CURRENT_VALUE:
yield
elif name not in os.environ:
if value is not None:
os.environ[name] = str(value)
yield
del os.environ[name]
else:
yield
else:
old_value = os.environ[name]
if value is not None:
os.environ[name] = str(value)
else:
del os.environ[name]
yield
os.environ[name] = old_value
def ffmpeg_thread_count(thread_count=USE_CURRENT_VALUE):
"""
Context manager to temporarily change the number of threads requested by cv2.VideoCapture.
This works manipulating global state, so this function is not thread safe. Take care
if you instantiate capture objects with different thread_count concurrently.
The actual behavior depends on the codec. Some codecs will honor thread_count,
while others will not. You can always call `video_capture_thread_count(cap)`
to check whether the concrete codec used does one thing or the other.
Note that as of 2018/03, we only support changing the number of threads for decoding
(i.e. VideoCapture, but not VideoWriter).
Parameters
----------
thread_count : int or None or `cv2utils.USE_CURRENT_VALUE`, default USE
* if None, then no change on the default behavior of opencv will happen
on opencv 3.4.1 and linux, this means "the number of logical cores as reported
by "sysconf(SC_NPROCESSORS_ONLN)" - which is a pretty aggresive setting in terms
of resource consumption, specially in multiprocess applications,
and might even be problematic if running with capped resources,
like in a cgroups/container, under tasksel or numactl.
* if an integer, set capture decoders to the specifiednumber of threads
usually 0 means "auto", that is, let ffmpeg decide
* if `cv2utils.USE_CURRENT_VALUE`, the current value of the environment
variable OPENCV_FFMPEG_THREAD_COUNT is used (if undefined, then the default
value given by opencv is used)
"""
return envvar(name='OPENCV_FFMPEG_THREAD_COUNT', value=thread_count)
def cv2_supports_thread_count():
"""Returns True iff opencv has been built with support to expose ffmpeg thread_count."""
return hasattr(cv2, 'CAP_PROP_THREAD_COUNT')
def video_capture_thread_count(cap):
"""
Returns the number of threads used by a VideoCapture as reported by opencv.
Returns None if the opencv build does not support this feature.
"""
try:
# noinspection PyUnresolvedReferences
return cap.get(cv2.CAP_PROP_THREAD_COUNT)
except AttributeError:
return None
def open_video_capture(path,
num_threads=USE_CURRENT_VALUE,
fail_if_unsupported_num_threads=False,
backend=cv2.CAP_FFMPEG):
"""
Returns a VideoCapture object for the specified path.
Parameters
----------
path : string
The path to a video source (file or device)
num_threads : None, int or `cv2utils.USE_CURRENT_VALUE`, default None
The number of threads used for decoding.
If None, opencv defaults is used (number of logical cores in the system).
If an int, the number of threads to use. Usually 0 means "auto", 1 "single-threaded"
(but it might depend on the codec).
fail_if_unsupported_num_threads : bool, default False
If False, an warning is cast if num_threads is not None and setting the
number of threads is unsupported either by opencv or the used codec.
If True, a ValueError is raised in any of these two cases.
backend : cv2 backend or None, default cv2.CAP_FFMPEG
If provided, it will be used as preferred backend for opencv VidecCapture
"""
if num_threads is not None and not cv2_supports_thread_count():
message = ('OpenCV does not support setting the number of threads to %r; '
'use loopbio build' % num_threads)
if fail_if_unsupported_num_threads:
raise ValueError(message)
else:
_log.warn(message)
with ffmpeg_thread_count(num_threads):
if backend is not None:
cap = cv2.VideoCapture(path, backend)
else:
cap = cv2.VideoCapture(path)
if cap is None or not cap.isOpened():
raise IOError("OpenCV unable to open %s" % path)
if num_threads is USE_CURRENT_VALUE:
try:
num_threads = float(os.environ['OPENCV_FFMPEG_THREAD_COUNT'])
except (KeyError, TypeError):
num_threads = None
if num_threads is not None and num_threads != video_capture_thread_count(cap):
message = 'OpenCV num_threads for decoder setting to %r ignored for %s' % (num_threads, path)
if fail_if_unsupported_num_threads:
raise ValueError(message)
else:
_log.warn(message)
return cap
|
If you get these functions, you can open and read capture like this:
| # Do whatever you need
if not cap.isOpened():
raise Exception('Something is wrong and the capture is not open')
retval, image = cap.read()
|
Hoping other people find these packages useful.
Written on Friday May 04, 2018
Here at loopbio gmbh we use and recommend the Python
programming language. For image processing our primary choice is Python + OpenCV.
Customers often approach us and ask what stack we use and how we set up our
environments. The short answer is: we use conda and
have our own packages for OpenCV and FFmpeg.

In the following post, we will bravely explain how easy it is to set up a
Conda environment for image processing using miniconda
and our packages for OpenCV and a matched FFmpeg version on Linux (Ubuntu).
If you are not familiar with the concept of Conda: Conda is a package manager and
widely used in science, data analysis and machine learning, additionally, it is
fairly easy and convenient to use.
If you are more interested in why we are using OpenCV, FFmpeg and Conda and
what performance benefits you can expect from our packages please check out
our other posts.
Install Miniconda
- Download the appropriate 3.X installer
- In your Terminal window, run:
bash Miniconda3-latest-Linux-x86_64.sh
- Follow the prompts on the installer screens.
If you are unsure about any setting, accept the defaults. You can change them later.
To make the changes take effect, close and then re-open your Terminal window.
- Test your installation (a list of pacakages should be printed).
conda list
More information is provided here
Setting up the environment
# Before getting our conda packages, get a conda-forge based environment.
# For example, use conda-forge by default for all your environments.
conda config --add channels conda-forge
# Create a new conda environment
conda create -n loopbio
# Source that environment
source activate loopbio
# install FFmpeg
# install and pin ffmpeg GPL (including libx264)...
conda install 'loopbio::ffmpeg=*=gpl*'
# ...or install and pin ffmpeg LGPL (without libx264)
conda install 'loopbio::ffmpeg=*=lgpl*'
# install and pin opencv
conda install 'loopbio::opencv=3.4.1'
Reading a video file
# Make sure that the loopbio environment is activated
source activate loopbio
# Start Python
python
In Python
import cv2
cap = cv2.VideoCapture('Downloads/small.mp4')
ret, frame = cap.read()
print frame
Written on Tuesday April 17, 2018
In the previous installment of our series on Video I/O we threatened thorough
benchmarks of video codecs. This series of blog posts is about ways to minimize delays
in bringing video frames both to the browser and to video analysis programs, including
training deep learning models from video data. In that post we showed plots like this one:
We used and will keep using what we called "exploded jpeg" as a baseline when talking about
video compression, as encoding images as jpeg is, by far, the most commonly way to transport image
data around in deep learning workloads. Because encoding and, more specially, decoding
are important core operations for us in loopy, and also because we want to give ourselves
a hard time trying to beat baselines, we strive to use the best possible software
for encoding and decoding jpeg data.
So what is the fastest way to read and write jpeg images these days? And how
can we get to use it in the most effective way? In this post we demonstrate
that using libjpeg-turbo is the way to go, presenting the first independent benchmark
(to our knowledge) of the newest jpeg turbo version and touching on a few related issues,
from python bindings to libjpeg-turbo to accelerated python and libjpeg-turbo conda packages.
So let's get started, shall we.
The Contenders
We are going to look across four dimensions here: libjpeg vs libjpeg-turbo,
current stable version of libjpeg-turbo (1.5.3) vs the upcoming version (2.0),
using libjpeg-turbo with different python wrappers, and using libjpeg-turbo
with different parameters controlling the tradeoff between decoding speed
and accuracy. On each round there will be a winner that gets to compete
in the next one.
There is one main open source library used for jpeg encoding: libjpeg. And there is one
main alternative to libjpeg for performance critical applications: libjpeg-turbo. Turbo
is a fork of libjpeg where a lot of amazing optimization work has been done to accelerate
it. Turbo works for many different computer architectures, and used to be a "drop-in"
replacement for libjpeg. This stopped being true when libjpeg decided to adopt some non-standard
techniques - perhaps hoping for them to become one day part of the jpeg standard.
Turbo decided not to follow that path. In principle this means that there might be some
non-standard jpeg images that turbo won't be able to decode[1]_.
However, given the prevalence of turbo in mainstream software (for example, it is used in
web browsers like firefox and chrome, and is a first class citizen in most linux
distributions), it is unlikely these incompatibilities will be seen in the wild.
Having decided that libjpeg-turbo is to be used, we turn our attention to the python
wrapper used on top of it. Our codebase has a strong pythonic aroma and therefore
we are most interested on reading and writing jpegs from python code. Therefore we are using libjpeg,
which is a C library, wrapped in python. We look here at two main wrappers: opencv, which we use as the
go-to library for reading images, and a simple ctypes wrapper (modified from
pyturbojpeg).
The simple ctypes wrapper exposes more libjpeg specific functionality from the wrapped C library
such as faster but less accurate decoding modes. Usually these modes are deactivated by default,
since they result in "less pleasant" images (for humans) in some circumstances. However
certain algorithms might not notice these differences - for example tensorflow activates some
of them by default under the (likely unchecked) premise that it won't matter for model performance.
The Benchmark
To measure how fast different versions of the libjpeg library can compress and
decompres, we have used 23 different images from a public image compression benchmark dataset,
some of our clients videos and even pictures of ourselves. We used these images at three different sizes,
corresponding (without modifying the aspect ratio) to 480x270 (small), 960x540 (medium)
and 1920x1080 (large) resolutions. We always used YUV420 as encoded color space and BGR
as pixel format.
The following are three images from our benchmark dataset, at "medium" size, as originally
presented to the codecs and after compression + decompression (with jpeg encoding quality set at 95
and using the fastest and less precise libjpeg-turbo decoding settings). Can you tell which one
is the original and which one is the round-tripped version? (note, we have shuffled these a bit
to make the challenge more interesting).


All data in this post is summarized results across all images, but it is important to note that
when dealing with compression, results might vary substantially depending on the kind of images
to be stored. In specific cases, such as when all images are similar, which might happen
when storing video data as jpegs, it might be useful to select encoding/decoding
parameters taylored to the data.
For each image and codec configuration we measured multiple times the round-trip
encoding-decoding speed with randomized measurement order. We have checked that
each roundtrip provides acceptable quality results using perceptual image comparison
between the original image and the roundtripped one.
We have timed speed when using libjpeg and libjpeg turbo via python wrappers and subsequently
the measurements always include some python specific costs - such as the time taken to allocate
memory to hold the results. It is expected some speedups can be achieved by optimizing these
wrappers memory usage strategies. We only measure speeds for image data already in RAM and that
is expected to be "cache-warm", so these microbenchmarks represent a somehow idealized
situation and should better be complemented with I/O and proper workload context.
All measurements were made on a single core of an otherwise idle machine,
sporting an intel i7-6850K and fairly slow RAM.
The Results
Encoding Speed
The following table shows average space savings for the benchmarked encode qualities.
These are identical for all the libjpeg variants used and are compared against the space
taken by the uncompressed image.
| Encode Quality |
Average Space Savings |
|---|
| 80 |
94.1 ± 2.8 |
| 95 |
87.2 ± 5.4 |
| 99 |
77.6 ± 8.4 |
Before showing our results summary, let us enumerate again the contenders:
- opencv_without_turbo: opencv wrapping libjpeg 9b
- opencv_with_turbo: opencv wrapping libjpeg-turbo stable (1.5.3)
- turbo_stable: ctypes wrapper over libjpeg-turbo stable (1.5.3)
- turbo_beta: ctypes wrapper over libjpeg-turbo 2.0 beta1 (1.5.90)
- turbo_beta_fast_dct: like turbo_beta, activating "fast DCT" decoding for all passes
- turbo_beta_fast_upsample: like turbo_beta, activating "fast upsampling" decoding
- turbo_beta_fast_fast: like turbo_beta, activating both "fast DCT" and "fast upsampling"
The following plot shows how encoding speed varies across different compression qualities
(you can show and hide contenders by clicking in the legend). We can see how
libjpeg-turbo is a clear winner. opencv_without_turbo is doing the same job
as its turbo counterpart opencv_with_turbo, just between 3 and 7 times slower. There
is a second relatively large gap between using opencv or using directly turbo
via ctypes, indicating that for high performance applications it would be worth
to use more specific APIs. Finally, the upcoming version of libjpeg-turbo also
brings a small performance bump worth pursuing.
Decoding Speed
The following plot shows decoding speed differences between our contenders,
as a function of the image quality.
Again, turbo is just much faster than vanilla libjpeg, using the ctypes wrapper is much faster than using opencv,
and using the newer version of turbo is worth it.
Three new candidates appear slightly on top of the speed ranking: turbo_beta_fast_dct, turbo_beta_fast_upsample
and turbo_beta_fast_fast. These activate options that trade higher speed for less accurate (or less visually pleasant)
approximations to decompression. They are deactivated by default in libjpeg-turbo, but other wrapper libraries,
notably tensorflow, do activate them by default under the premise that machine learning should not be affected by
the loss of accuracy. The same that our tests did not find any relevant difference on speed, they did not
show any elevated loss on visual perception scores, so we do not have any strong opinion on activating them or not,
we just think it is now mostly irrelevant.
Why is the ctypes wrapper faster than opencv? There probably are several reasons, but if one looks briefly
to the opencv implementation, a clear suspect arises. With libjpeg-turbo you can specify wich pixel format the
jpeg data is using (the jpeg standard is actually agnostic of which order do the color channels appear in the file)
to avoid unneeded color space conversions. OpenCV instead goes a long way to non-optionally convert between RGB and BGR,
probably to ensure that jpeg data is always RGB (which is a more common use) while uncompressed data is always BGR
(a contract for opencv). Add to this that opencv barely expose some of the features of libjpeg and it does not
have libjpeg-turbo specific bindings, our advice here would be to use a more specific wrapper to libjpeg-turbo.
Talking about wrappers, let's look at the last plot (for today). Here we show decoding speeds as a function
of image size.
The larger the image, the faster we decompress. This is normal: there is some work that needs to be done
before and after each decompression. The take home message here is, to our mind, to improve the wrappers to
minimize constant performance overheads they might introduce. An obvious improvement is to use an already allocated
(pinned if planning to use in GPUs) memory pool. This should prove beneficial, for example, when feeding minibatches
to deep learning algorithms. A more creative improvement would be to stack several images together and
compress them into the same jpeg buffer.
Note also that there are several features of turbo we have not explored here. An important example is support
for partial decoding (decode a region (crop) of an image without doing all the work to decode the whole image),
which was introduced in turbo recently (partially by google) and was then exposed in tensorflow. We have not actually
found ourselves in need for these advanced features, but let the need come, we are happy to know we have our backs
covered by a skilled community of people seeking our same goals: to get image compression and decompression times
out of our relevant bottlenecks equations.
Speeding Up Your Code
TLDR; use our opencv and libjpeg-turbo conda packages
So how do one use libjpeg-turbo?. Well, as we mentioned, libjpeg-turbo is everywhere
these days - so some software you run is probably already using it.
If you are using Firefox or Chrome to read this post, it is very likely that jpeg images are
being decompressed using turbo. If you use tensorflow to read your images, you are using turbo.
On many linux distributions libjpeg-turbo is either the default package or can be installed to replace
the vanilla libjpeg package. We are not very knowledgeable of what is the story with other platforms,
but we suspect that libjpeg-turbo reach and importance extends to practically any platform where jpeg
needs to be processed.
What if you use the conda package manager? In this case you might be a bit out of luck, because the two main
package repositories (defaults and conda-forge) have moved to exclusively use libjpeg 9b in their stack.
If you try to use a libjpeg-turbo package in a modern conda environment, chances are that you will bump
into severe (segfaulty) problems. This is a bit of a disappointment given that conda is commonly
used in the scientific, data analysis and machine learning fields these days.
But good news! if you are on linux your luck has changed - all you need to do is to use
our opencv and libjpeg-turbo packages (which bring along our ffmpeg package). Because
we use these packages in loopy we keep them in sync with the main conda channels and
ready to be used by any conda user.
These packages avoid problems with parallel installations of libjpeg 9 and libjpeg-turbo,
and offer other few goodies (like the ability to choose between GPL and non-GPL versions of ffmpeg or
patches to control video decoding threading when done via opencv). The creation of these modified packages
was not a small feature and will also be covered in a future blog post. In the meantime, you can just use
any of these command lines to use the packages:
# before running this, you need conda-forge in your channels
conda config --add channels conda-forge
# this would get you our latest packages
conda install -c loopbio libjpeg-turbo opencv
# this would get you and pin our current packages (N.B. requires conda 4.4+)
conda install 'loopbio::opencv=3.4.1=*_2' 'loopbio::libjpeg-turbo=1.5.90=noclob_prefixed_gcc48_0'
Or add something like this to your environment specifications (note these are the exact software
versions we used when benchmarking for this post):
1
2
3
4
5
6
7
8
9
10
11
12
13
14
15
16
17
18
19
20
21
22
23
24
25
26
27
28 | name: jpegs-benchmark
channels:
- loopbio
- conda-forge
- defaults
dependencies:
# uncomment any of these to get the opencv / turbo combo you want
# note that, at the moment of writing, these pins are not always respected
# see: https://github.com/conda/conda/issues/6385
# opencv compiled against turbo 2.0beta1
- loopbio::opencv=3.4.1=*_2 # compiled against turbo 2.0beta1
# opencv compiled against turbo 1.5.3
# - loopbio::opencv=3.4.1=*_1
# opencv compiled against libjpeg 9
# - conda-forge::opencv=3.4.1
# libjpeg-turbo 2.0beta1
- loopbio::libjpeg-turbo=1.5.90=noclob_prefixed_gcc48_0
# libjpeg-turbo 1.5.3
# - loopbio::libjpeg-turbo=1.5.3
|
Finally, you can use these packages with our pyturbojpeg
fork to achieve better performance than generic libjpeg wrappers like PIL or opencv. If you
install both the turbo packages and our wrapper, you can easily compress and decompress
jpeg data like this:
| from turbojpeg import Turbojpeg
turbo = Turbojpeg()
roundtrip = turbo.decode(turbo.encode(image))
|
Conclusions
If you need very fast jpeg encoding and decoding:
- Use turbo
- Use turbo with fast wrappers
- Use the latest version of turbo and decide for yourself if using faster modes for encoding and decoding is worth it.
- If you use conda then use our accelerated jpeg and opencv packages
We also think that any benchmark for, let's say, image minibatching for deep learning, should explicitly
include a solution based on libjpeg-turbo as a contender.
Finally, use turbo also if you do not need any of these things as it is very easy to install (on linux)
and will probably magically speed up many other things on your computer.
It is good to remember that open source software always needs a hand.